Blog - Benson Arafat

Stay updated...

Build A ChatGPT on Flutter using OpenAI API

ChatGPT (Generative Pre-trained Transformer) is a chatbot launched by OpenAI in November 2022. It is built on top of OpenAI’s GPT-3.5 family of large language models and is fine-tuned with both supervised and reinforcement learning techniques.

ChatGPT was launched as a prototype on November 30. 2022 and quickly gained attention for its detailed responses and articulate answers across many domains of knowledge. its uneven factual accuracy was identified as a significant drawback.

In this article, we’ll learn how to use the OpenAI API to build a ChatGPT application on Flutter.

Building this application we’ll need the following:

  1. API token: We will need an API token from OpenAI, you can get your API token from the OpenAI Account Dashboard. If you don’t have an account you can create one.
  2. http: http flutter package for handling http request
  3. provider: The Provider package is an easy-to-use package which is basically a wrapper around inheritedWidget that makes it easy to use and manage. It provides a state management technique that is used to manage a piece of data around the app.
  4. animated_text_kit: A flutter package that contains a collection of some cool and awesome text animation
  5. flutter_svg: An SVG rendering and widget library for flutter, which allows planting and displaying Scalable Vector Graphic files.

With all things set, let’s start building. 🍾 🍻

Open your terminal and create your flutter app using flutter cli

flutter create openai-chat

When the app has been created, open the folder in your VSCode or any Text Editor you are making use of.

Open the lib folder and open the main file, clear out the initial code which was created with the app, because we are going to start building our app from the ground up.

Your main.dart file will now look like this by creating a Stateful Widget

import 'package:flutter/material.dart';

void main() {
WidgetsFlutterBinding.ensureInitialized();
runApp(const MyApp());
}

class MyApp extends StatefulWidget {
const MyApp({super.key});

@override
State<MyApp> createState() => _MyAppState();
}

class _MyAppState extends State<MyApp> {
@override
Widget build(BuildContext context) {
return MaterialApp(
title: "Open AI Chat",
home: SafeArea(
bottom: true,
top: false,
child: Scaffold(
backgroundColor: const Color(0xff343541),
appBar: AppBar(
backgroundColor: const Color(0xff343541),
leading: IconButton(
onPressed: () {},
icon: const Icon(
Icons.menu,
color: Color(0xffd1d5db),
),
),
elevation: 0,
title: const Text("New Chat"),
centerTitle: true,
actions: [
IconButton(
onPressed: () {},
icon: const Icon(
Icons.add,
color: Color(0xffd1d5db),
),
),
],
),
body: Stack(
[],
),
),
),
);
}
}

So, now that we have our app set up we can start building all the different widgets. We are going to have four (4) different widgets

  1. User Input Widget
  2. User message Widget
  3. AI Message Widget
  4. Loader Widget

Create a folder called widgets, this will contain all four widgets we will work on soon.

User Input Widget

import 'package:flutter/material.dart';

class UserInput extends StatelessWidget {
final TextEditingController chatcontroller;
const UserInput({
Key? key,
required this.chatcontroller,
}) : super(key: key);

@override
Widget build(BuildContext context) {
return Align(
alignment: Alignment.bottomCenter,
child: Container(
padding: const EdgeInsets.only(
top: 10,
bottom: 10,
left: 5,
right: 5,
),
decoration: const BoxDecoration(
color: Color(0xff444654),
border: Border(
top: BorderSide(
color: Color(0xffd1d5db),
width: 0.5,
),
),
),
child: Row(
children: [
Expanded(
flex: 1,
child: Image.asset(
"images/avatar.png",
height: 40,
),
),
Expanded(
flex: 5,
child: TextFormField(
onFieldSubmitted: (e) {

},
controller: chatcontroller,
style: const TextStyle(
color: Colors.white,
),
decoration: const InputDecoration(
focusColor: Colors.white,
filled: true,
fillColor: Color(0xff343541),
suffixIcon: Icon(
Icons.send,
color: Color(0xffacacbe),
),
focusedBorder: OutlineInputBorder(
borderSide: BorderSide.none,
borderRadius: BorderRadius.all(
Radius.circular(5.0),
),
),
border: OutlineInputBorder(
borderRadius: BorderRadius.all(
Radius.circular(5.0),
),
),
),
),
),
],
),
),
);
}
}

The UserInput accepts one parameter which is the chatcontroller, also we have onFieldSubmitted callback method which we will use when the user submits their message.

User Message Widget


class UserMessage extends StatelessWidget {
final String text;
const UserMessage({
Key? key,
required this.text,
}) : super(key: key);

@override
Widget build(BuildContext context) {
return Container(
padding: const EdgeInsets.all(8),
child: Row(
mainAxisAlignment: MainAxisAlignment.start,
crossAxisAlignment: CrossAxisAlignment.start,
children: [
Expanded(
flex: 1,
child: Padding(
padding: const EdgeInsets.all(8.0),
child: Image.asset(
"images/avatar.png",
height: 40,
width: 40,
fit: BoxFit.contain,
),
),
),
Expanded(
flex: 5,
child: Padding(
padding: const EdgeInsets.only(
left: 3,
top: 8,
),
child: Text(
text,
style: const TextStyle(
color: Color(0xffd1d5db),
fontSize: 16,
fontWeight: FontWeight.w700,
),
),
),
),
],
),
);
}
}

The user message pass the user message as a parameter to the Usermessage class which will be appended to the ListView

AI Message Widget


class AiMessage extends StatelessWidget {
final String text;
const AiMessage({
Key? key,
required this.text,
}) : super(key: key);

@override
Widget build(BuildContext context) {
return Container(
color: const Color(0xff444654),
padding: const EdgeInsets.all(8),
child: Row(
crossAxisAlignment: CrossAxisAlignment.start,
children: [
Expanded(
flex: 1,
child: Padding(
padding: const EdgeInsets.all(8.0),
child: Container(
color: const Color(0xff0fa37f),
padding: const EdgeInsets.all(3),
child: SvgPicture.asset(
"images/ai-avatar.svg",
height: 30,
width: 30,
fit: BoxFit.contain,
),
),
),
),
Expanded(
flex: 5,
child: AnimatedTextKit(
animatedTexts: [
TypewriterAnimatedText(
text,
textStyle: const TextStyle(
color: Color(0xffd1d5db),
fontSize: 16,
fontWeight: FontWeight.w700,
),
),
],
totalRepeatCount: 1,
),
),
],
),
);
}
}

The AI message pass the user message as a parameter to the AiMessage class which will be appended to the ListView.

Using the AnimatedTextKit package we can animate our text using the typewriter animation.

Loader Widget

class Loading extends StatelessWidget {
final String text;
const Loading({
Key? key,
required this.text,
}) : super(key: key);

@override
Widget build(BuildContext context) {
return Container(
color: const Color(0xff444654),
padding: const EdgeInsets.all(8),
child: Row(
crossAxisAlignment: CrossAxisAlignment.start,
children: [
Expanded(
flex: 1,
child: Padding(
padding: const EdgeInsets.all(8.0),
child: Container(
color: const Color(0xff0fa37f),
padding: const EdgeInsets.all(3),
child: SvgPicture.asset(
"images/ai-avatar.svg",
height: 30,
width: 30,
fit: BoxFit.contain,
),
),
),
),
Expanded(
flex: 5,
child: Text(
text,
style: const TextStyle(
color: Color(0xffd1d5db),
fontSize: 16,
fontWeight: FontWeight.w700,
),
),
),
],
),
);
}
}

The Loader Widget is used to await a response from the API call, then the response is completed we remove the loader from the list.

APP Constant

const endpoint = "https://api.openai.com/v1/";
const aiToken = "sk-------------------------------------";

Create a file called api_constants.dart this will contain our endpoint and API token, you can get your API token from API TOKEN DASHBOARD

OpenAI Repository

class OpenAiRepository {
static var client = http.Client();

static Future<Map<String, dynamic>> sendMessage({required prompt}) async {
try {
var headers = {
'Authorization': 'Bearer $aiToken',
'Content-Type': 'application/json'
};
var request = http.Request('POST', Uri.parse('${endpoint}completions'));
request.body = json.encode({
"model": "text-davinci-003",
"prompt": prompt,
"temperature": 0,
"max_tokens": 2000
});
request.headers.addAll(headers);

http.StreamedResponse response = await request.send();
if (response.statusCode == 200) {
final data = await response.stream.bytesToString();

return json.decode(data);
} else {
return {
"status": false,
"message": "Oops, there was an error",
};
}
} catch (_) {
return {
"status": false,
"message": "Oops, there was an error",
};
}
}
}

Now, let’s communicate with Open AI API. We have to create a file called openai_repository.dart in the repository folder. In the file, we have a class called OpenAIRepository which has a static method called sendMessage which accepts just a single parameter prompt

Authentication

The OpenAI API uses API keys for authentication. Visit your API Keys page to retrieve the API key you’ll use in your requests if you have not done that. All you have to do is use the constant.

All API requests should include your API key in an Authorization HTTP header as follows:

Authorization: Bearer YOUR_API_KEY

Making Request

{
"model": "text-davinci-003",
"prompt": prompt,
"temperature": 0,
"max_tokens": 2000
}

This request queries the Davinci model to complete the text starting with a prompt you sent from your user input. The max_tokens parameter sets an upper bound on how many tokens the API will return. The temperature means the model will take more risks. Try 0.9 for more creative applications, and 0 for ones with a well-defined answer.

This will return a Map<String, dynamic> response that looks like this.

{
"id": "cmpl-GERzeJQ4lvqPk8SkZu4XMIuR",
"object": "text_completion",
"created": 1586839808,
"model": "text-davinci:003",
"choices": [
{
"text": "\n\nThis is indeed a test",
"index": 0,
"logprobs": null,
"finish_reason": "length"
}
],
"usage": {
"prompt_tokens": 5,
"completion_tokens": 7,
"total_tokens": 12
}
}

ChatModel


class ChatModel extends ChangeNotifier {
List<Widget> messages = [];

List<Widget> get getMessages => messages;

Future<void> sendChat(String txt) async {
addUserMessage(txt);

Map<String, dynamic> response =
await OpenAiRepository.sendMessage(prompt: txt);
String text = response['choices'][0]['text'];
//remove the last item
messages.removeLast();
messages.add(AiMessage(text: text));

notifyListeners();
}

void addUserMessage(txt) {
messages.add(UserMessage(text: txt));
messages.add(const Loading(text: "..."));
notifyListeners();
}
}

Since we are using provider as our State management, we create a class called ChatModel which extends the ChangeNotifier. We make an empty List<Widget> which we will use to push in new messages (Widget). A getter getMessages to get messages,

We create a method called sendChat which takes the user input and then calls the addUserMessage which pushes a new widget containing the user message and also the loader widget to the messages list.

Next, we send the prompt message to the OpenAI Repository which then sends back a response. We then store the text into a variable String called text.

Next, we remove the Loader Widget from the List and add the AIMessage Widget

Almost done… 🤞🏽

We have to go back to our userInput Widget and call sendChat when the user tries to submit his message. Your code will look much like this now.

TextFormField(
onFieldSubmitted: (e) {
context.read<ChatModel>().sendChat(e);
chatcontroller.clear();
},

Hit it🚀

All have to do now, is to edit our main.dart file. Wrap the body in MultiProvider and your code will look something like this.

body: MultiProvider(
providers: [
ChangeNotifierProvider(create: (_) => ChatModel()),
],
child: Consumer<ChatModel>(builder: (context, model, child) {
List<Widget> messages = model.getMessages;
return Stack(
children: [
//chat

Container(
margin: const EdgeInsets.only(bottom: 80),
child: ListView(
children: [
const Divider(
color: Color(0xffd1d5db),
),
for (int i = 0; i < messages.length; i++) messages[i]
],
),
),
//input
UserInput(
chatcontroller: chatcontroller,
)
],
);
}),
),

App Running 🛸🚁

All done, you can start using the ChatGPT on your Flutter App. You can also clone the repo right here 👉🏾 https://github.com/bensonarafat/openai-chat Have any questions, drop your comment here and I will response as soon as possible.

Cascade operator (.., ?.. ) and Triple dot […] (Spread Operator) in Dart.

Cascades (..?..) allow you to make a sequence of operations on the same object. In addition to accessing instance members, you can also call instance methods on that same object. This often saves you the step of creating a temporary variable and allows you to write more fluid code.

Example

Consider the following example code

var paint = Paint()
  ..color = Colors.black
  ..strokeCap = StrokeCap.round
  ..strokeWidth = 5.0;

The constructor, Paint(), returns a Paint object. The code that follows the cascade notation operates on this object, ignoring any values that might be returned.

The previous example is equivalent to this code:

var paint = Paint();
paint.color = Colors.black;
paint.strokeCap = StrokeCap.round;
paint.strokeWidth = 5.0;

If the object that the cascade operates on can be null, then use a null-shorting cascade (?..) for the first operation. Starting with ?.. guarantees that none of the cascade operations are attempted on that null object.

querySelector('#confirm') // Get an object.
  ?..text = 'Confirm' // Use its members.
  ..classes.add('important')
  ..onClick.listen((e) => window.alert('Confirmed!'))
  ..scrollIntoView();

The previous code is equivalent to the following:

final addressBook = (AddressBookBuilder()
      ..name = 'jenny'
      ..email = 'jenny@example.com'
      ..phone = (PhoneNumberBuilder()
            ..number = '415-555-0100'
            ..label = 'home')
          .build())
    .build();

Be careful to construct your cascade on a function that returns an actual object. For example, the following code fails:

var sb = StringBuffer();
sb.write('foo')
  ..write('bar'); // Error: method 'write' isn't defined for 'void'.

The sb.write() call returns void, and you can’t construct a cascade on void.

Spread Operator

Dart 2.3 introduced the spread operator (...) and the null-aware spread operator (...?), which provide a concise way to insert multiple values into a collection.

For example, you can use the spread operator (...) to insert all the values of a list into another list:

var list = [1, 2, 3];
var list2 = [0, ...list];
assert(list2.length == 4);

If the expression to the right of the spread operator might be null, you can avoid exceptions by using a null-aware spread operator (...?):

var list2 = [0, ...?list];
assert(list2.length == 1);

Reference

https://dart.dev/guides/language/language-tour#_operators

https://dart.dev/guides/language/language-tour#spread-operator

https://github.com/dart-lang/language/blob/master/accepted/2.3/spread-collections/feature-specification.md

Understanding JavaScript Spread syntax (…) and Common Uses Cases

The spread operator allows an iterable, such as an array or string, to be expanded in places where zero or more arguments (for function calls) or elements and the syntax for this is three periods (…)

In this article, I will explain the use case of the spread operator in JavaScript, so let’s jump right to it.

Use Cases

Adding the elements of an existing array into a new array

let newarr = ["Red", "Yellow"];
let otherarr = ["Blue", ...newarr, "Green"] 
console.log(otherarr); // ["Blue", "Red", "Yellow", "Green"];

So let’s explain what is happening here, newarr is an array containing two strings Red and Yellow, then the second array otherarr contains two strings and the newarr, usually, when we add this array without the three periods operator it will add the new array into the other array. but as we have the spread operator it will add the element of the array into the other array.

You can pass elements of an array as arguments to a function

function addThreeNumbers(x,y,z){
   return x+y+z;
}
let args = [1,2,3];
addThreeNumbers(...args); // 6 

Another use case is that you can pass an element of an array as a function. in the above example, we have a function addThreeNumbers with three parameters x,y,z which return the sum of these three numbers. Now we have an array with three values 1,2,3. In a normal state, we can pass three arguments to the function but with the help of the spread operator, we just pass the array with the three-dot operator (…), which will spread out the array to each element of the function.

Note: If we have a fourth element in the array it going to ignore the fourth element in the array, like the example below.

function addThreeNumbers(x,y,z){
   return x+y+z;
}
let args = [1,2,3,4];
addThreeNumbers(...args); // 6 

Copy Arrays

let arr1 = [1,2,3];
let arr2 = [...arr1]

So if we have arr1 we can use the spread operator to copy the array into the second array.

Concatenate array

let arr1 = [1,2,3];
let arr2 = [5,6,7];
arr1.concat(arr2); // [1,2,3,5,6,7]
arr1 = [...arr1 ...arr2]; // [1,2,3,5,6,7]

Another use case is that we can concatenate arrays together, normally how we do this, is we use the concat method to concatenate arrays together but with the spread operator, we can concatenate arrays too.

Reference

https://developer.mozilla.org/en-US/docs/Web/JavaScript/Reference/Operators/Spread_syntax

Adding Nigeria State and City Dropdown to your Flutter App

You have gotten to that point in your app where you want to take user State and City. Yes, I know creating a drop-down takes much time.

So I thought of making a flutter package which makes this task easy and makes development easy. Using nigeria_states_dropdown you can do all this with one click.

How to start?

Run this command:

With Flutter:

 $ flutter pub add nigeria_states_dropdown

This will add a line like this to your package’s pubspec.yaml (and run an implicit flutter pub get):

dependencies:
  nigeria_states_dropdown: ^0.0.1

Alternatively, your editor might support flutter pub get.

Import it
import 'package:nigeria_states_dropdown/nigeria_states_dropdown.dart';

Great, now you have added the package. I know your next question, how can you use it? Well, it’s simple.

   NigeriaStatesDropDown(
    onStateChange: (String state) {
        print("State $state");
        setState(() {});
    },
    onTownChange: (String town) {
        setState(() {
        print("Town $town");
        });
    },
    ),

All you have to do is add this widget any where you want to use it and that all.

To call feedback or getting data from this widget, you can make function in onChanged

Example

void main() => runApp(const MyApp());

class MyApp extends StatefulWidget {
  const MyApp({Key? key}) : super(key: key);

  @override
  State<MyApp> createState() => _MyAppState();
}

class _MyAppState extends State<MyApp> {
  @override
  Widget build(BuildContext context) {
    return MaterialApp(
      title: 'Material App',
      home: Scaffold(
        appBar: AppBar(
          title: const Text('Nigeria State Drop Down'),
        ),
        body: Padding(
          padding: const EdgeInsets.all(8.0),
          child: Column(
            children: [
              NigeriaStatesDropDown(
                onStateChange: (String state) {
                  print("State $state");
                  setState(() {});
                },
                onTownChange: (String town) {
                  setState(() {
                    print("Town $town");
                  });
                },
              ),
            ],
          ),
        ),
      ),
    );
  }
}

Conclusion

You can also check github example, drop your issues and contribute

Thanks

Happy Coding

Handling All PHP Errors

Sometimes your PHP application might produce many different types of earnings and errors or sometimes you might see a blank page which might not understand if you are getting an error or not.

In this article, we will discuss all PHP errors, warnings and how you can turn on/off these errors. So if you are having problems with your PHP application and need to display all the errors and warnings, you are in the right place, we will also discuss how to event collect them when your site is now online.

Display all PHP errors

ini_set('display_errors', 1);
error_reporting(E_ALL);

Now, let’s explain what these lines mean in plain text

ini_set function

The ini_set function allows you to override the configuration found in your PHP.ini file. The display_errors option will determine if the errors will be displayed or hidden. It’s important that this error mode be turned off during production.

So how can you use this? If you want to display errors you simply pass a value 1 to hide errors and pass a value 0

ini_set('display_errors', 1); //display errors 
ini_set('display_errors', 0); //hide errors

Note: Using this won't be able to display parse errors such as missing semicolons or missing curly braces. In this case, you have modifiy your PHP ini configuration

Setting up your PHP.ini to display errors

If you can’t see errors after using the ini_set to display errors, don’t worry you can still do that by going to your PHP.ini file

How to locate your PHP.ini file

If you are using xampp, you can find your PHP.ini file with these steps.

  • Open the directory where you install your xampp.
  • Look for a folder called PHP
  • In the PHP folder, you can scroll down or use the search option to locate the php.ini file.

Turn on display errors in the PHP.ini file

If you have successfully located the PHP.ini file bravo, all we have to do is to open the file with a text editor and search for display_errors then we change its value to on.

display_errors = on

Note: After we have made a change on the php.ini file and saved the file, we must restart our server.

Display PHP Errors via .htaccess Configuration

You can also enable or disable error mode using the .htaccess file located in the root or public directory of the project

php_flag display_startup_errors on 
php_flag display_errors on

This is the same as you add to the PHP code to show PHP errors. Depending on which files you have access to and how you do deployments and server configurations, you may want to configure display_erros in .htaccess or your PHP.ini file. Many hosting providers will not allow you to modify your PHP.ini file to enable display_errors.

In the .htaccess file, a custom error log can also be enabled as long as the log folder or the log file is writable by the web server. The log file can be a relative path to where the .htaccess is located, or it can be an absolute path such as

/var/www/html/website/public/logs

php_value error_log logs/all_errors.log

PHP Warnings and Notices

Most times, the warnings don’t affect our application but will cause some fatal errors in certain conditions. So these errors must be fixed because this means that the application won’t run normally under certain scenarios. In case these warnings cause a lot of errors, then it would be more practical to hide the errors and just show the warning messages.

error_reporting(E_WARNING);

Hiding and showing a warning is just as simple as adding a single line of code. To show warnings and notices, the parameter for the error reporting function will be E_WARNING | E_NOTICE.

The error_reporting function can also accept E_ERROR and E_PARSE parameters as bitwise operators. To report all errors except for notices, then the parameter is E_ALL & ~E_NOTICE where E_ALL stands for all possible parameters of the error reporting function.

error_reporting(0);

To remove all errors, warnings, and parse message notices, the parameter that should be passed to the error_reporting function is zero (0). It would be not practical to have this line of code in each of the PHP files. it would be better to turn off report messages in the PHP ini file or in the .htaccess.

error_reporting(E_NOTICE);

PHP allows variables to be used even when not declared. This is not standard practice because undeclared variables will cause issues for the application once it is used in loops and conditions.

Sometimes this also happens because the declared variable has a different spelling than the variable being used for conditions or loops. When E_NOTICE is passed in the error_reporting function, then these undeclared variables will be displayed in the web application.

error_reporting(E_ALL & ~E_NOTICE);

the error reporting function allows you to filter which errors can be shown. The “~” character means “note” so the parameter ~E_NOTICE means not to show notices. Notice the “&” and “|” characters in between the possible parameters. The “&” character is for “true for all”, while the “|” character represents either one as long as it is true. These two characters have the same meaning in PHP conditions OR and AND.

Hope this helps you understand how to handle PHP warnings and errors, if you find anything which is not clear you can leave a comment below.

Thanks.

10 awesome extensions VSCode for Laravel/PHP

10 Awesome VS Code Extensions for PHP/Laravel Developers

We all know how text editors are very important to us when we code, for everyone who is getting started with Laravel.

Below, are my list of the Top 10 extensions I recommend for all Laravel/PHP developers, which will help you expand your productivity.

1. Laravel Artisan

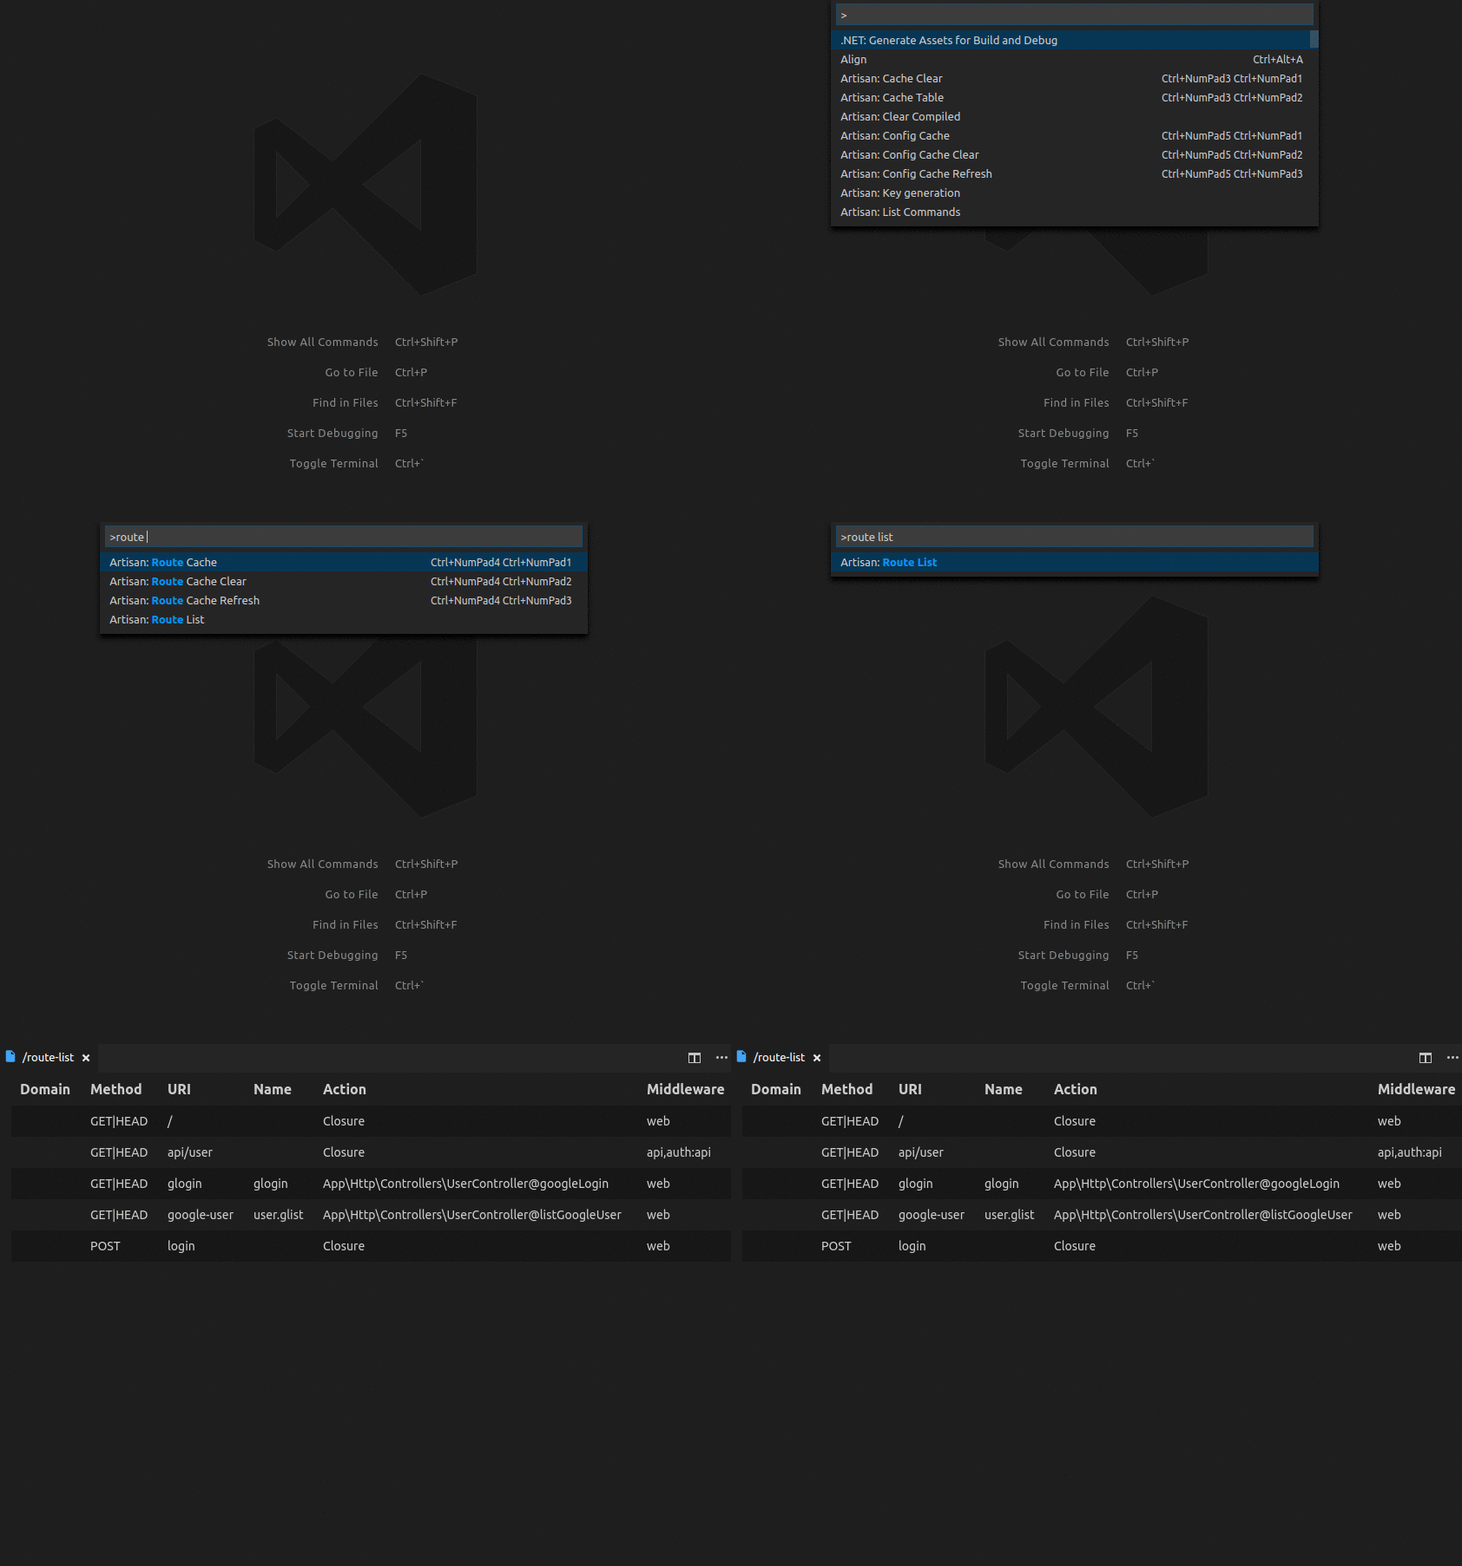
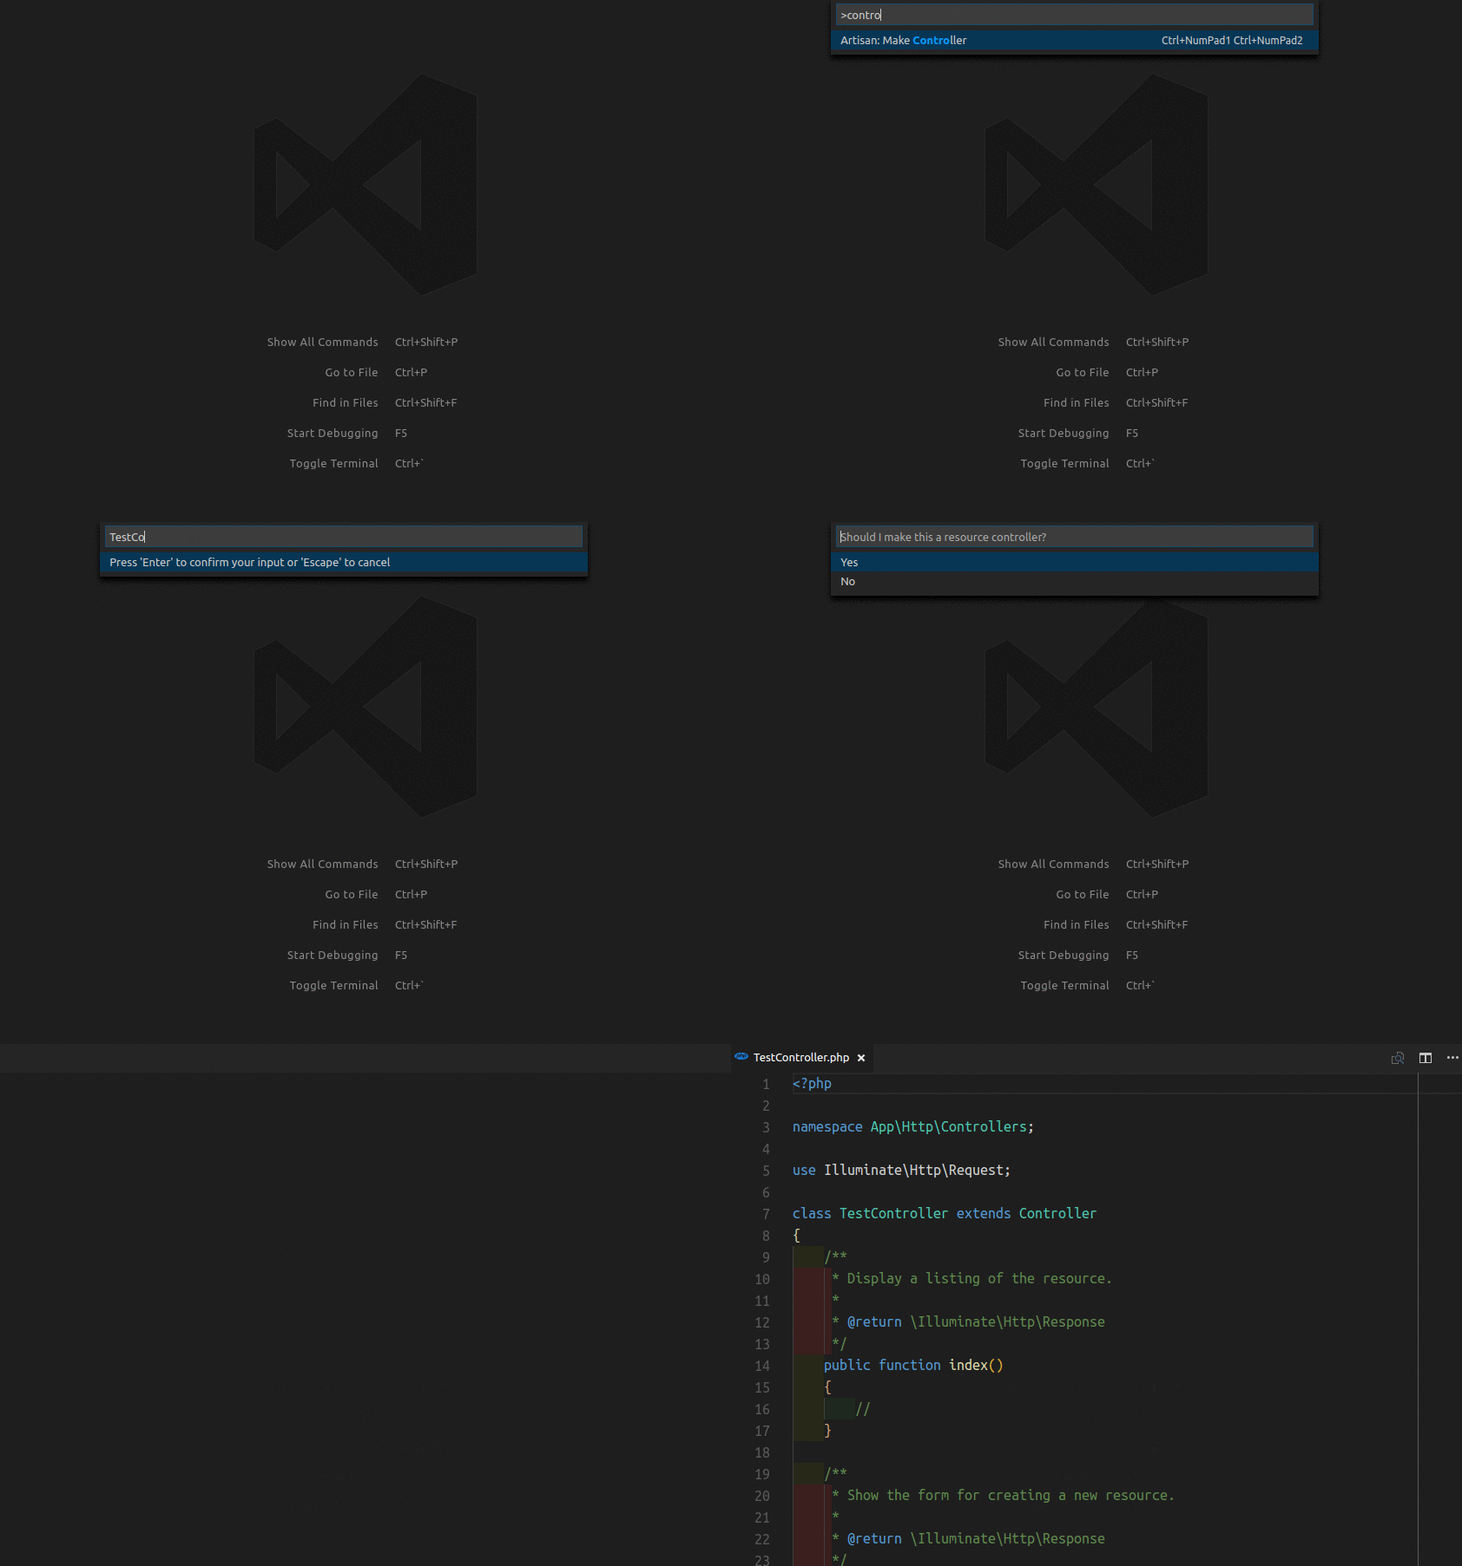
We all use the VS Code terminal to run artisan commands and that is great but using the Laravel Artisan Extension you can run the artisan commands from within VS Code directly.

Get a List of Route
Make controller

Some of the main features are:

  • Make files (Controllers, Migrations, Models, etc)
  • Run Custom Commands
  • Manage the database
  • Clear Caches
  • Generate Keys
  • View all routes
  • Start/stop a local PHP server for test purposes

Laravel Artisan on VS Code

2. Laravel Blade Snippets

Laravel Blade Snippets extensions add syntax highlight support

Laravel blade support

Some of the features are

  • Blade syntax highlight
  • Blade snippets
  • Emmet works in blade template
  • Blade formatting

After that is done, there is some other stuff to be done for the extension to work properly. Go to File -> Preferences -> Settings and add this to your settings.json

"emmet.triggerExpansionOnTab": true, // enable tab to expanse emmet tags
"blade.format.enable": true,         // if you would like to enable blade format
"[blade]": {
    "editor.autoClosingBrackets": "always"
},

For more information on how to use the Laravel Blade Snippets make sure to your check here documentation here.

Laravel Blade Snippets on VS Code

3. Laravel Blade Spacer

Laravel blade spacer helps to automatically add spacing to blade templating markers.

Laravel Blade Spacer

Supports the following tags

  • {{ }}
  • {!! !!}
  • {{-- --}}

Laravel Blade Spacer

4. Laravel Extra Intellisense

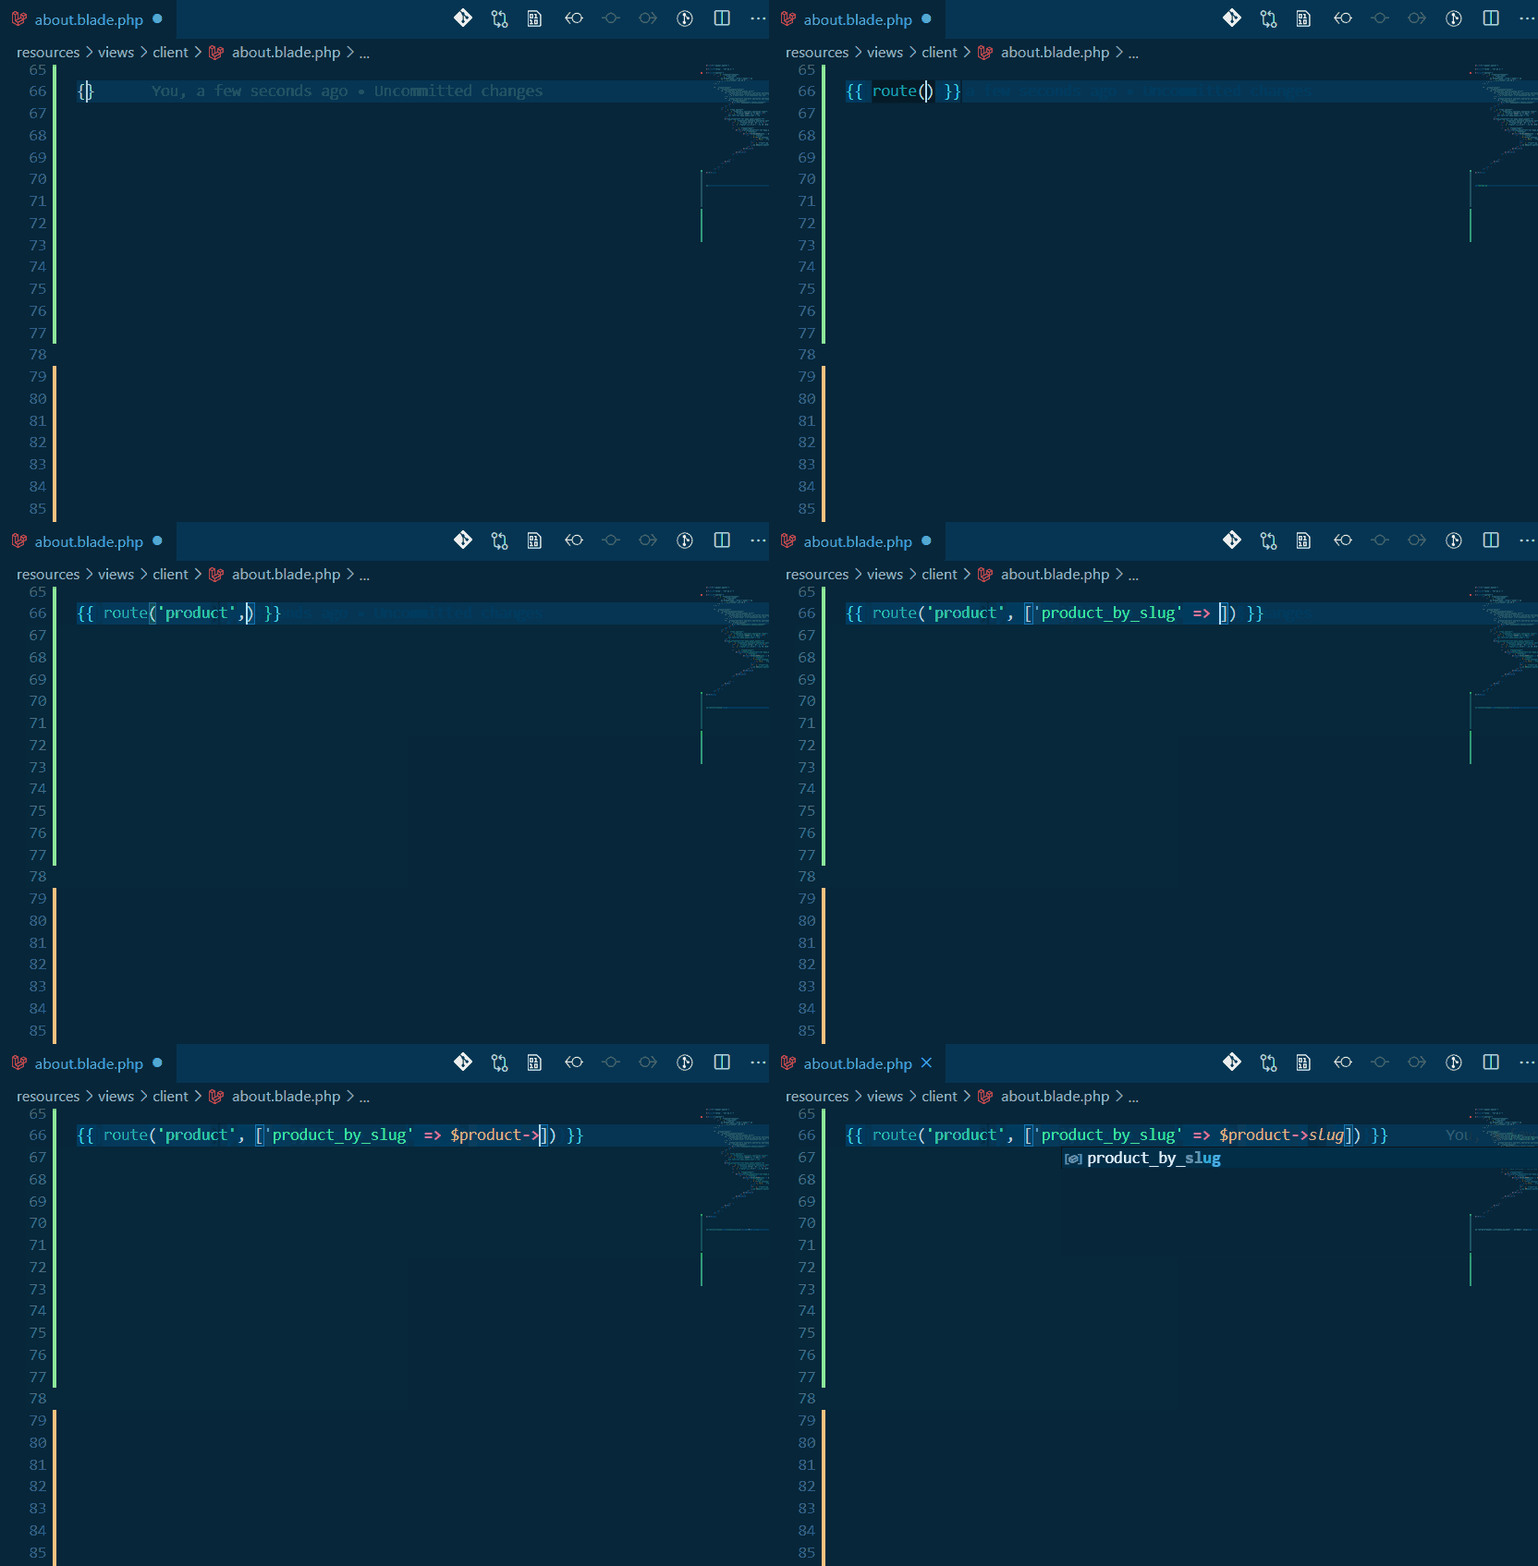
Laravel Extra Intellisense provides Laravel route, views and autocompletes for VS Code

Route names and route parameters

Some of the autocomplete features are

You can also check the documentation on how to set it up.

Laravel Extra Intellisense

5. Laravel goto view

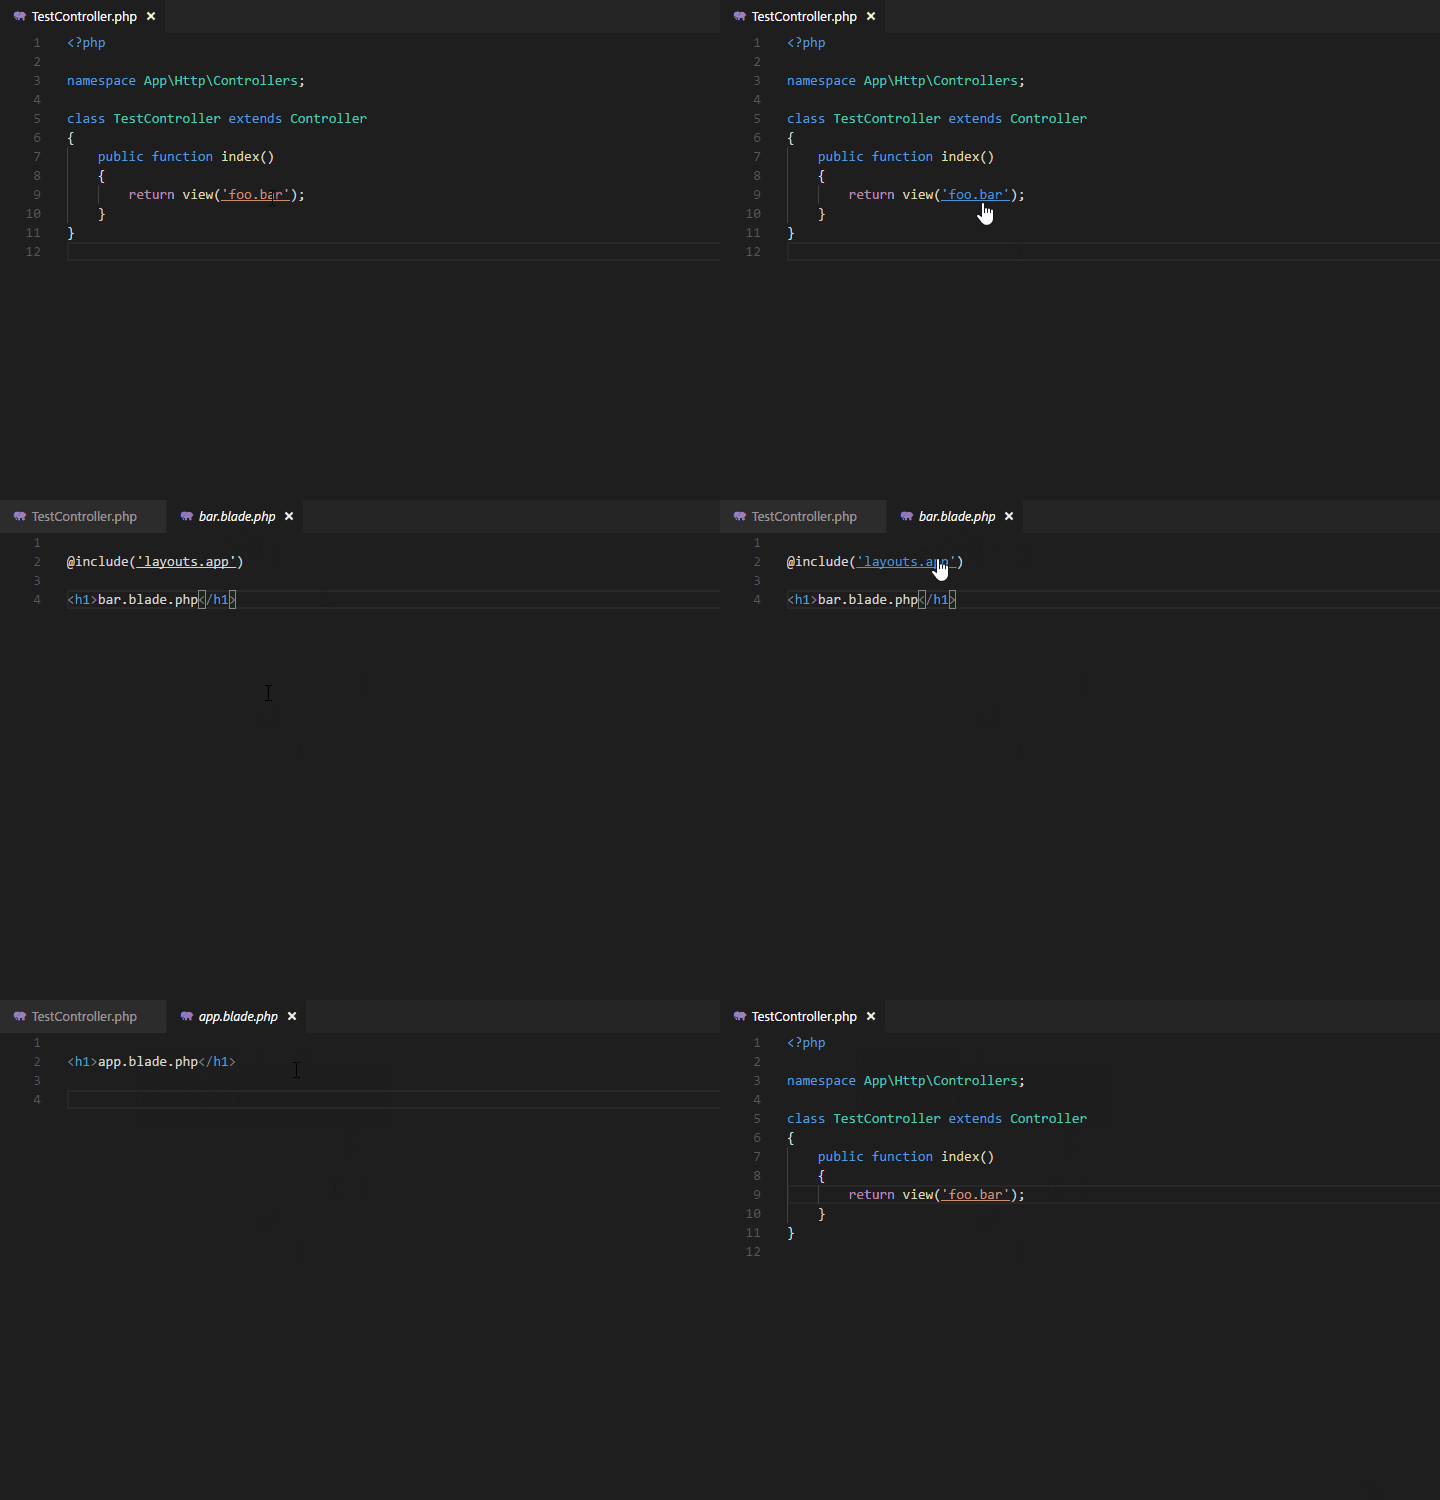
This is one of my favourite extensions when developing in Laravel, this extension helps you go to a particular view when clicked.

how to use

How to use this extension

You can use Ctrl or Alt + click to jump to the first matched Blade View file

Laravel goto View on VS Code

6. DotENV

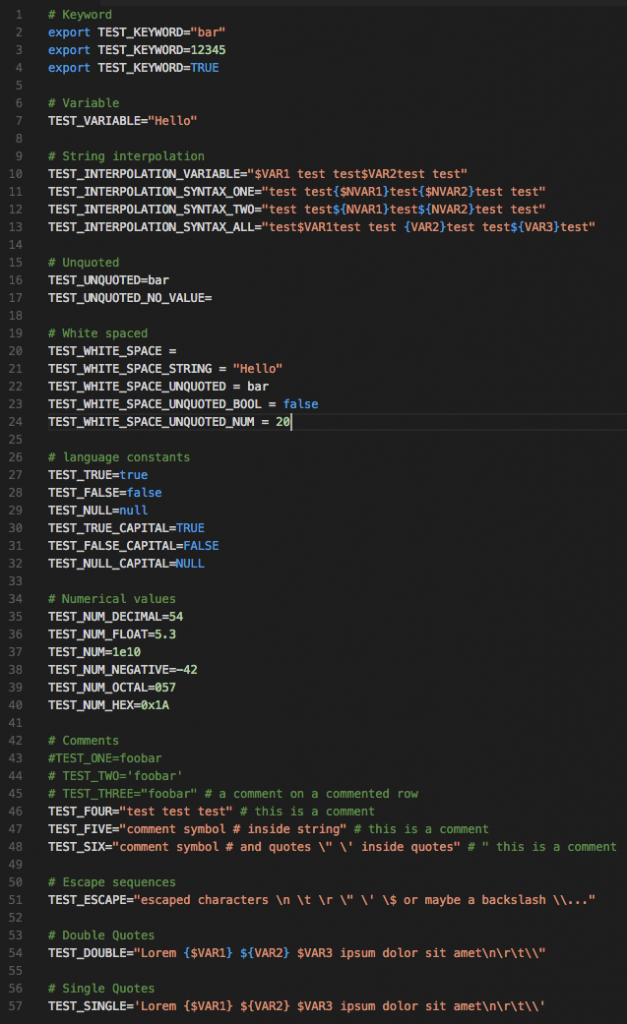
DotENV extensions helps a lot in VS Code .env sytnax highlighting

DotENV Sample

You can check DotENV documentation for more information.

DotENV on VS Code

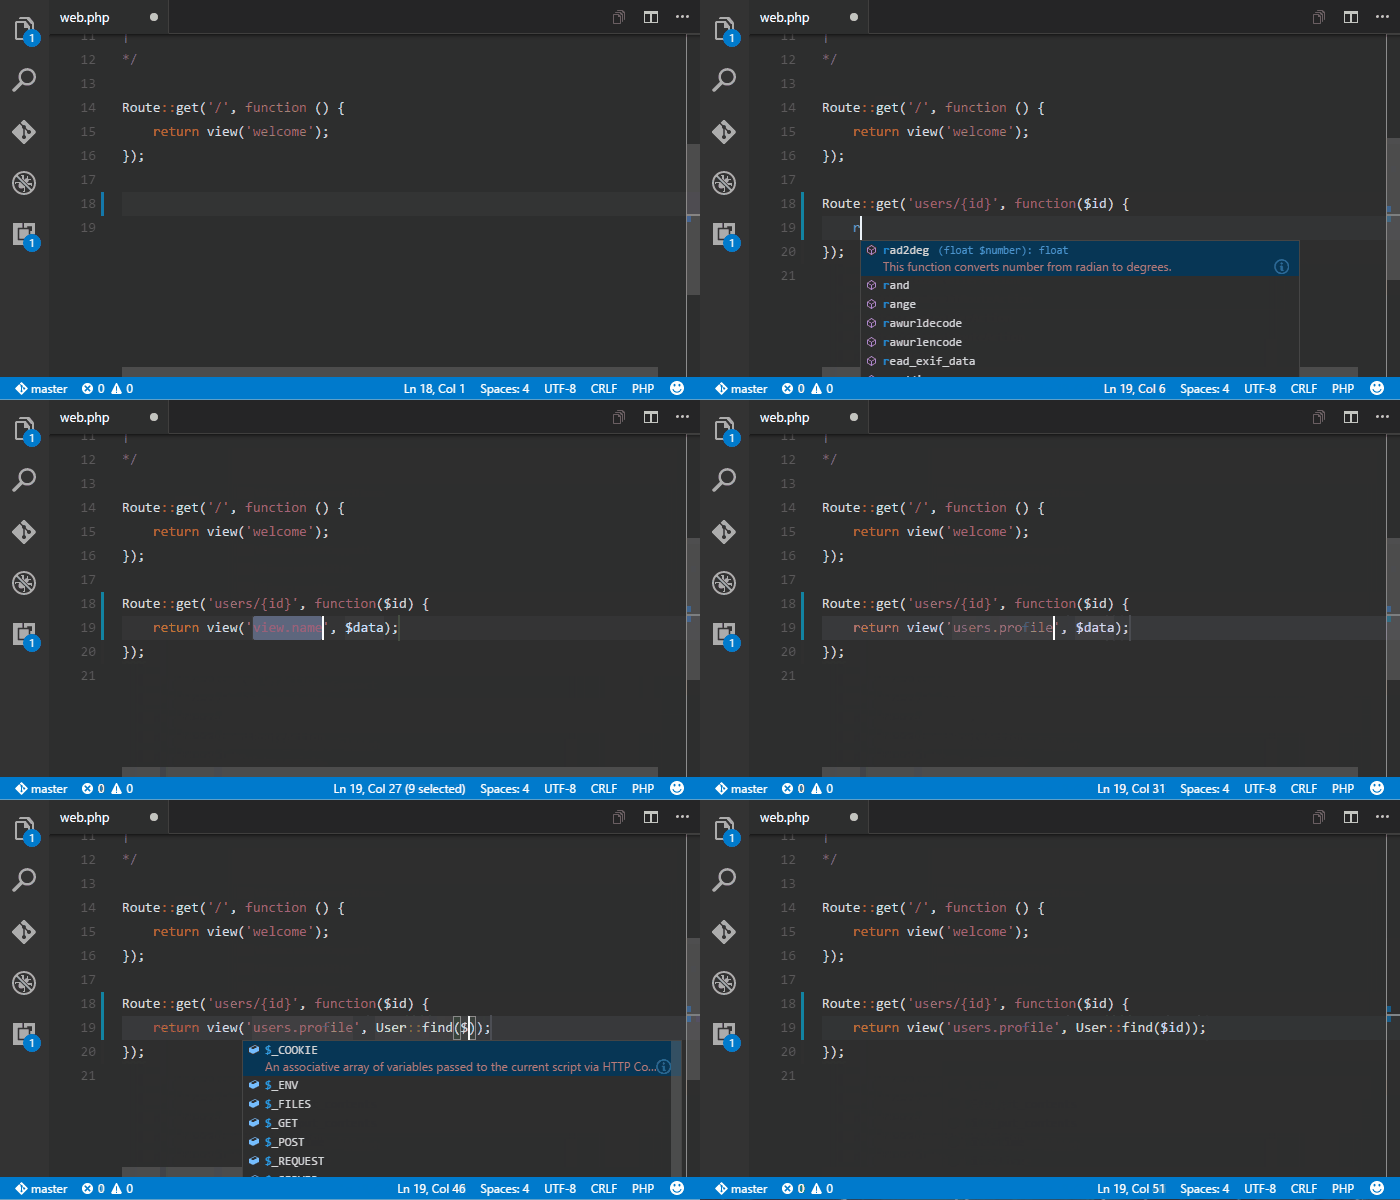
7. Laravel Snippets

Laravel snippets extension for VS Code Support Laravel 5 and above, this snippet provides prefix follows Laravel Facades for example Route:: Request::

Support Snippets Prefix

  • Auth
  • Broadcast
  • Cache
  • Config
  • Console
  • Cookie

Browse the documentation for more about the Laravel Snippets extensions

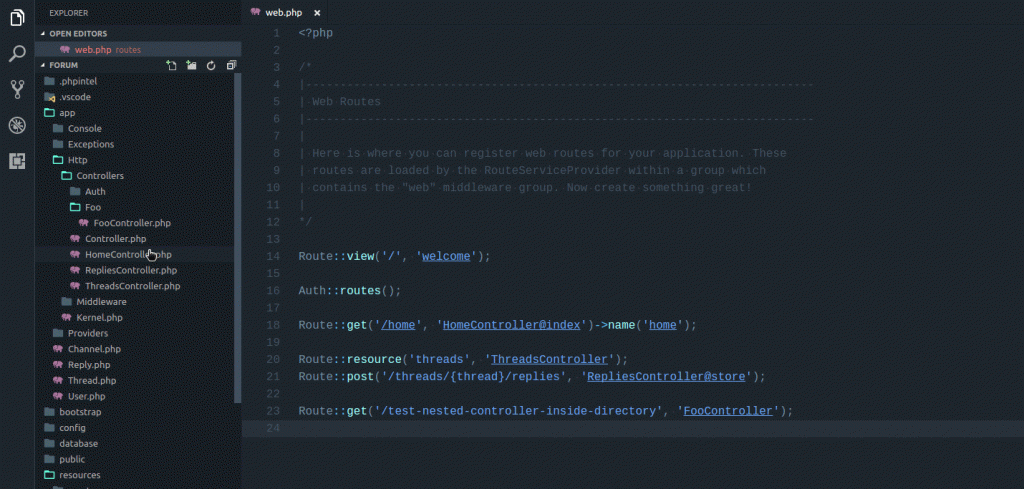
8. Laravel goto controller

As your application grows, the number of your Controllers grows as well, so at some point, you might end up with hundreds of controllers. Hance finding your way around might get tedious.

This is the exact problem that the Laravel-goto-controller VScode extension solves.

The extension allows you to press Alt + click on the name of the controller in your routes file, and it will navigate you from the route to the respective controller file:

Laravel goto controller

For more information, make sure to check the documentation here:

VSCode extension for Laravel

9. PHP Namespace Resolver

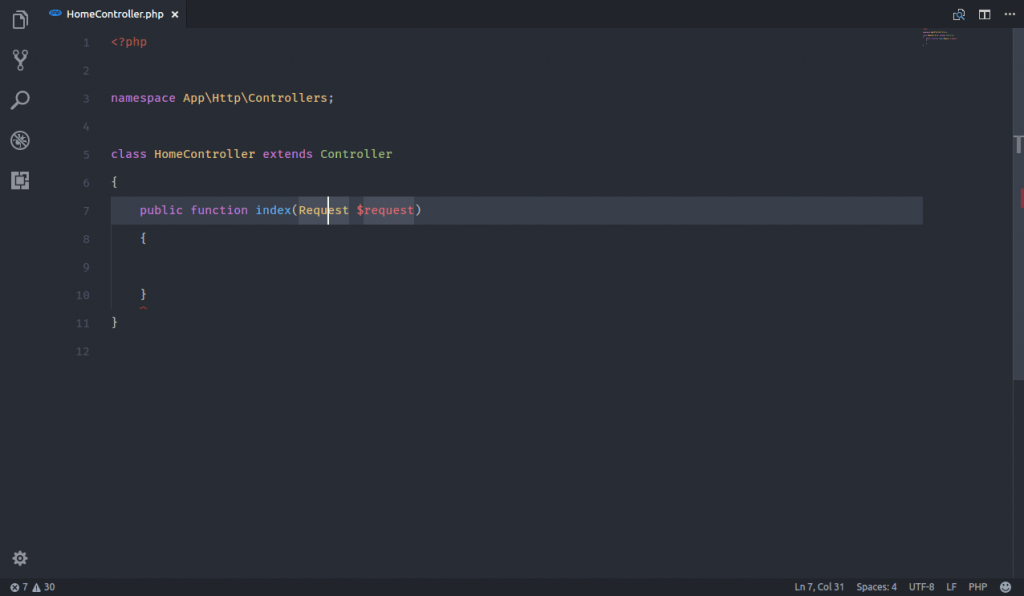
PHP Namespace Resolver can import and expand your class. You can also sort your imported classes by line or in alphabetical order.

PHP namespace resolver

For more details, you can check the online documentation on more configurations

PHP Namespace Resolver on VS Code

10. PHP Formatter

After installing as an extension with Visual Studio Code, this extension automatically formats your PHP code, in accordance with PSR-0, PSR-1, PSR-2 or Symfony style conventions.

PHP formatter

Some of the features are:

  • Format current selection only, or the whole file.
  • Trigger formatting with custom keybindings or actions.
  • Supports formatting on save.
  • Supports adjustable level (i.e. PSR2) and fixers.
  • Can be configured to support other file extensions than PHP as well, i.e. “.inc” files.
  • Supports different PHP-CS-Fixer installation methods, i.e. Composer vs manual installation.

For more on how to set up and use the PHP formatter on VS Code, you can go through the online documentation

PHP Formatter on VS Code

Conclusion

If you like all those extensions, you can take a look at the Laravel Extension Pack on VS Code, where you could get all of the mentioned extensions as 1 bundle!

The only extension not included in the pack is the Laravel Blade Spacer, so make sure to install it separately!

I hope that this helps!

How to upload your Laravel Website on Cpanel

In this article, I will be sharing with you how you can publish your Laravel website on Cpanel.

With these few steps, you will be able to have your site fully functional online, You can also watch the video above for a virtual practice.

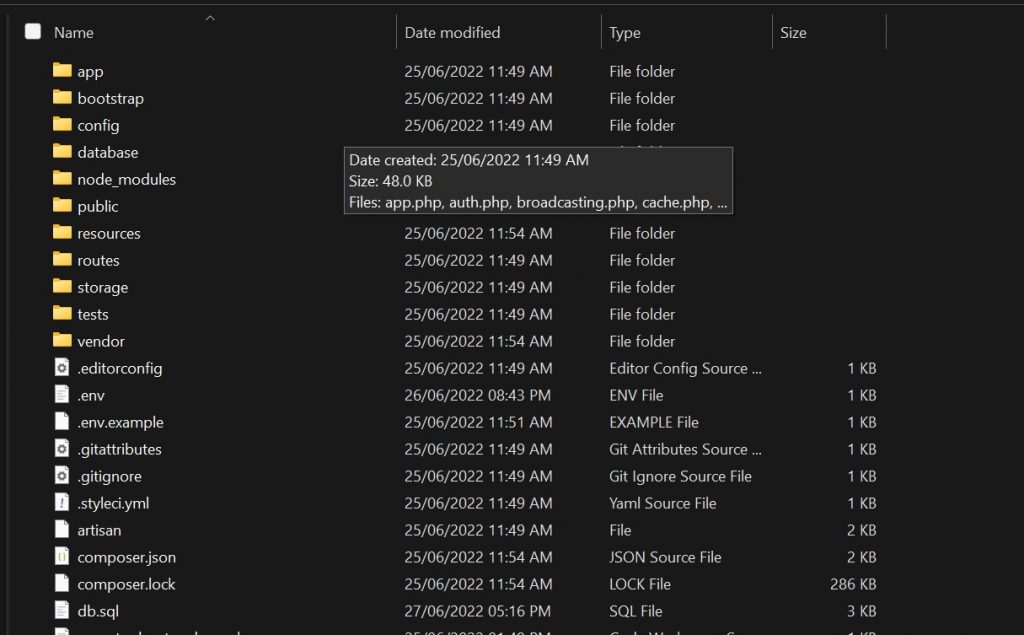
1. Compress Laravel files

Compress all your files

Laravel Project files

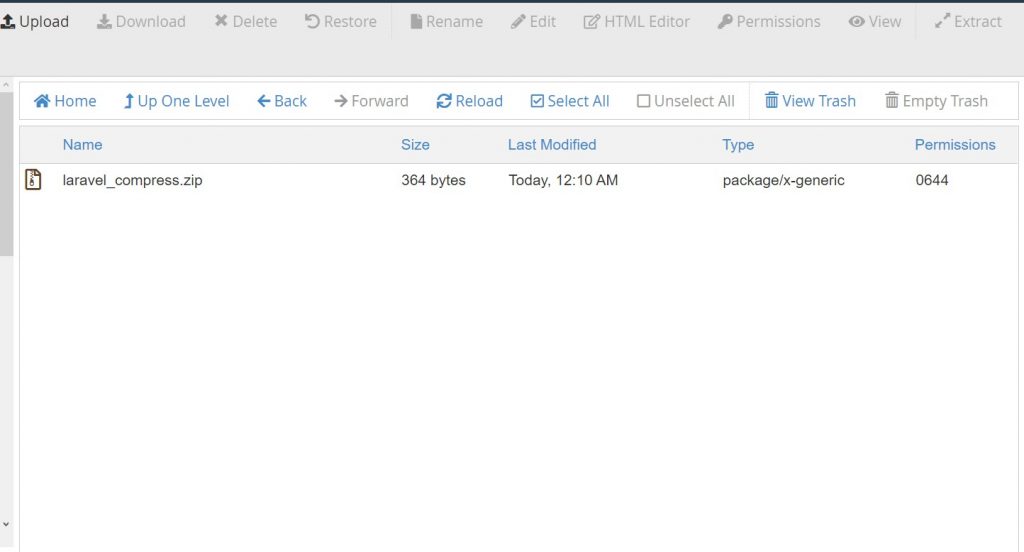
2. Upload on Cpanel

Upload the compressed files to the directory your site is located.

Uploaded laravel project

3. Extract files

Next, all you have to do is to extract the files

Extract files

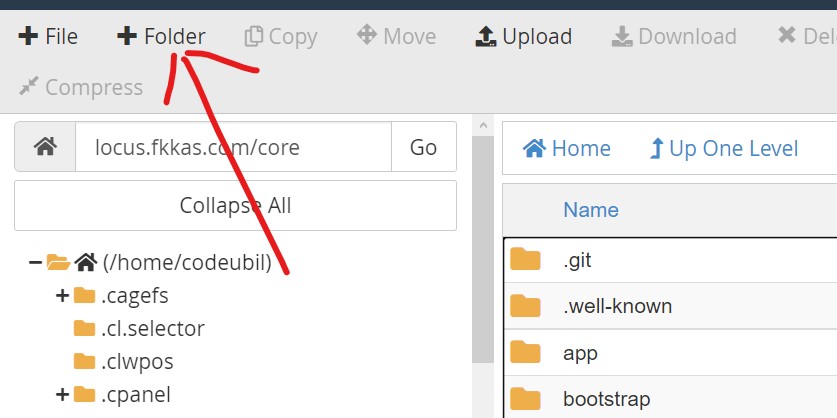
4. Create a folder called Core

At the top left corner, you can create a new folder, for the sake of this tutorial we will call this folder core.

Create New Folder

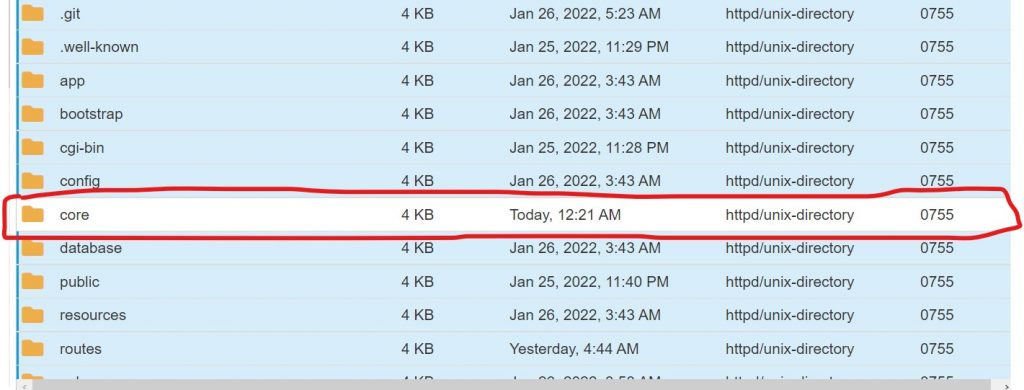
5. Move all files

Now that we have our core folder, we can select all files (except the core folder we just created) and move them all into the core folder.

move into core

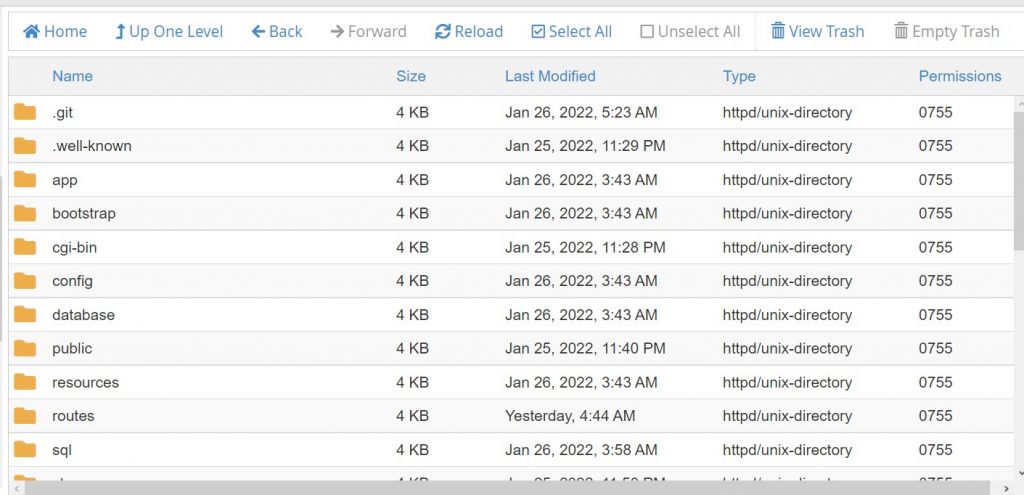
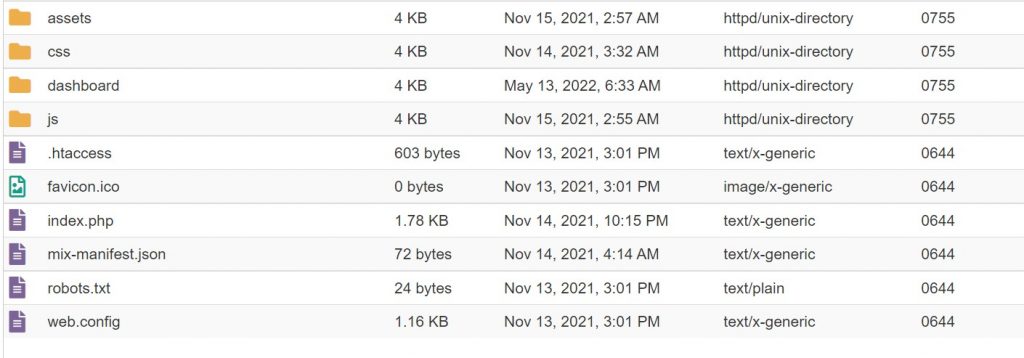
6. The Public folder

Next, we move into the public folder which is now inside the core folder. Our public folder will look something like this depending on what it contains.

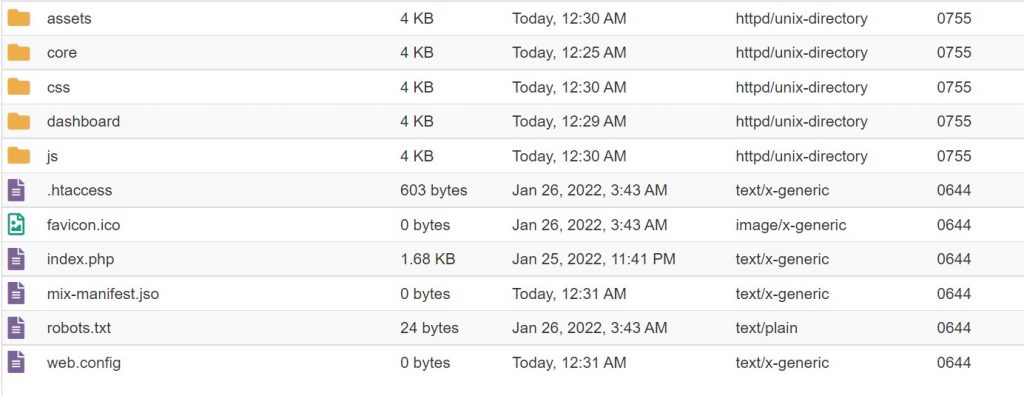
public folder

All we have to do is to select all the files and move them to the root folder of our directory. The root folder (or root directory) is the top-level directory of a file system. Now we will have this on our root folder.

the root folder

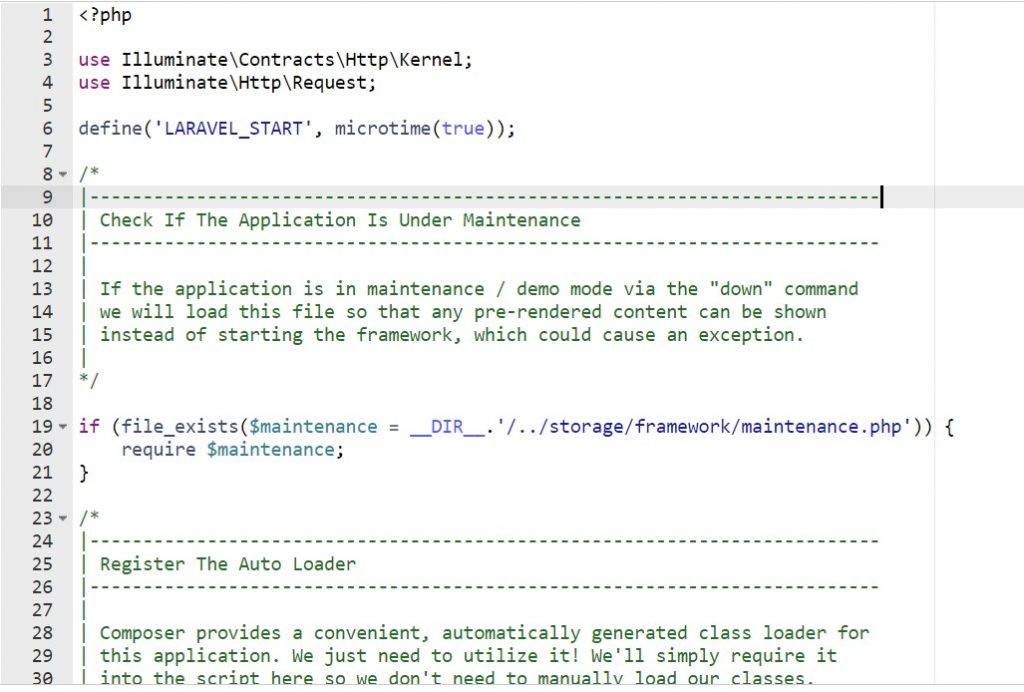
Lastly, one final step finishing everything up. All we have to do is to open the index.php page by right-clicking and then click on the edit option.

index.php

Now, you have a live editor open. All you have to do is change the files directory to the new location we now have.

They are three(3) lines of code we have to change.

if (file_exists($maintenance = __DIR__.'/../storage/framework/maintenance.php')) {
    require $maintenance;
}

It will be changed to

if (file_exists($maintenance = __DIR__.'/core/storage/framework/maintenance.php')) {
    require $maintenance;
}

Next

require __DIR__.'/../vendor/autoload.php';

It will be changed to

require __DIR__.'/core/vendor/autoload.php';

Lastly

$app = require_once __DIR__.'/../bootstrap/app.php';

changed to

$app = require_once __DIR__.'/core/bootstrap/app.php';

You will notice all we just did was just add the core folder.

Oh yeah. test your site now. You can see your site is now live.

Have any questions, you can leave is below the comment section, I will be very happy to help.

Thanks.

Powered by WordPress & Theme by Anders Norén